As an Amazon Associate, we earn from qualifying purchases. Some links on this site are affiliate links at no extra cost to you. Our recommendations are based on thorough research and editorial judgment.

How to Perform the Water Test on Your New Pressure Cooker
Have you just scored a new pressure cooker and want to make sure it works right? The water test is a great way to kick things off. It’s pretty simple and ensures you’re set for your cooking adventures.
You may be interested


First, take a look at the sealing ring. If it seems dirty or damaged, give it a quick clean or consider replacing it. Then, grab your inner pot and make sure it’s spotless too.
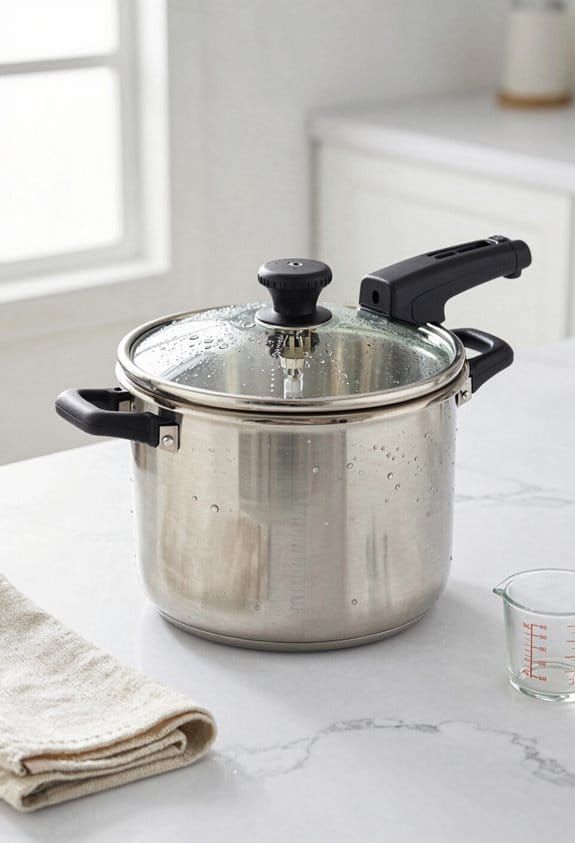
Now for the fun part: add 2 to 3 cups of cold water to the pot, but keep an eye on the maximum fill line. You don’t want any messy overflows!
Next, it’s time to close the lid securely and set the venting knob to sealing. After that, hit the Pressure Cook button and set it for 5 minutes. You’ll see the display show “On” while it preheats, letting you know everything is working as it should. Pretty cool, right?
So, what’s next? After the timer goes off, you can release the pressure. But be careful to follow the instructions for your specific model. If the steam doesn’t release properly, it could be a sign that something’s off.
Doing this test gives you peace of mind that your pressure cooker is ready for action. How exciting is that? Happy cooking!
Key Takeaways
- Ensure the sealing ring is properly fitted and the venting knob is set to sealing before starting the test.
- Pour 2 to 3 cups of water into the stainless steel inner pot, avoiding the maximum fill line.
- Securely close the lid by aligning arrows and turning clockwise until it clicks into place.
- Set the cooking time to 5 minutes and monitor the display as it transitions to “On” during preheating.
- After cooking, confirm the float valve has dropped, and safely release steam before opening the lid.
How to Perform the Water Test on Your Pressure Cooker
Feeling a bit hesitant about using your pressure cooker for the first time? You’re not alone. It can feel a bit intimidating, but getting comfortable with your appliance is a must. One of the best ways to do that is through the water test. Here’s how to nail it.
Start by ensuring the silicone sealing ring is snug and correctly placed on the lid. You’ll want to make sure there’s nothing blocking the venting knob or the floating valve. Once that’s sorted, grab 2 to 3 cups of cold water and pour it into the inner pot—just don’t go over the max fill line. This step is crucial!
Now, let’s get the lid on. Line up the arrows and twist it clockwise until it’s secure. Here’s the trick: make sure to set the pressure cooker to the sealing position before moving on, then select the pressure cook function. Go ahead and set the timer for 5 minutes. When you hear the timer beeping, it’s time to perform a quick pressure release by flipping that pressure release switch to venting. Just watch out for the hot steam; it can be a little surprising!
Frankly, you’re on your way to becoming a pressure cooking pro. So, how does it feel to have taken this first step? You’ve got this, and before you know it, you’ll be whipping up dishes like a champ! Remember, auto-sealing lids are a key safety feature that helps make the water test and regular cooking safe and secure.
Preparing Your Pressure Cooker for the Test
Getting your pressure cooker ready for that water test can feel a bit daunting, but it doesn’t have to be! Before you dive in, let’s make sure everything’s set up just right.
First things first, take a moment to check the silicone sealing ring. It should be snugly positioned on the lid. This is super important because a proper seal is key to avoiding any messes during cooking. Then, give your venting knob and floating valve a quick once-over. They should be free from any blockages to ensure they work smoothly.
Next, make sure the stainless steel inner pot is placed correctly inside the cooker. It should fit snugly without any wiggle. Now, it’s time for the fun part—adding water! Pour in about 2 to 3 cups of cold water, but pay attention not to fill it beyond the maximum line. Trust me, going over that line can lead to some frustrating spills.
Finally, let’s talk about closing it up. Align the arrows on the lid and the base before you lock it down. This little step helps ensure you’ve got everything in the right place. For best results, ensure your pressure cooker is placed on a stable surface to maintain safety during the test.
Essential Safety Checks Before Starting the Water Test

Before you dive into that water test, stop and think: what safety checks have you done? It might feel tempting to skip right to the fun part, but taking a few moments to ensure everything’s set up properly can make a huge difference in your cooking experience.
First up, make sure the silicone sealing ring is sitting right in the lid. It’s all about getting that airtight seal, so your food cooks just as it should. Then there’s the venting knob and floating valve—they need to be clear and working well. If they’re stuck, you won’t get the pressure you need, which could lead to a less-than-great outcome.
Also, don’t forget to check those all-important safety features of your pressure cooker. Taking a minute to inspect them can help you avoid any accidents down the line. And while you’re at it, it’s a good idea to familiarize yourself with the components and what they do. Knowledge is power!
Finally, double-check that the inner stainless steel pot is correctly placed in the cooker housing. You don’t want to get into the cooking phase and realize something’s off. Trust me: safety first is the way to go, folks!
Additionally, using temperature resistant labels can help you track maintenance or safety checks on your pressure cooker for future reference.
Adding the Right Amount of Water
Adding the Right Amount of Water
Measuring water for your pressure cooker can feel a little tricky. You might be wondering how much is just right. The straightforward rule is to start with 2 to 3 cups of cold water added to the inner pot. It’s key to pay attention to the maximum fill line inside the pot. If you go over that line, you risk spills or uneven cooking.
You should also remember the minimum liquid requirement for pressure cooking, which is usually 1 cup. This liquid is what creates steam to build up pressure effectively. So, what’s the magic number? Sticking to these guidelines ensures your pressure cooker works smoothly throughout the cooking process.
Here’s a tip: Do a little water test before you dive into your recipe. This way, you can rest assured you’ve got the right amount of water. It’ll help avoid potential mishaps later on. Happy testing!
Also, make sure to consider your pressure cooker’s capacity and size to ensure you don’t exceed the recommended fill level.
Close the Lid Securely: Step-by-Step Guide
Have you ever found yourself in a frenzy, ready to whip up a delicious meal in your pressure cooker, but then hit a roadblock when it comes to closing the lid? You’re not alone! Here’s the scoop on how to get that lid on securely so you can get cooking without a hitch.
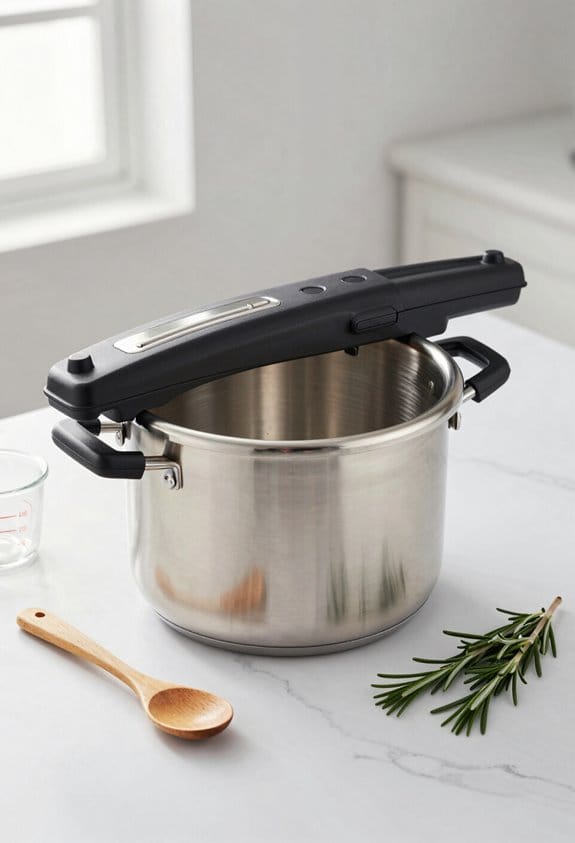
Start by pouring in the right amount of water into your pressure cooker. Once that’s done, it’s time to focus on the lid. Line up the two arrows on the lid and the base—this step is crucial for keeping everything sealed tight. When they’re aligned, turn the lid clockwise until you hear that satisfying click. It’s a little sound that can save you from a mess later on.
Now, take a second to really look; check for any gaps between the lid and pot. If you see any, that means you’re not quite there yet. If your pressure cooker has a venting knob, don’t forget to make sure it’s in the sealing position. We want to trap that steam, not let it escape!
Frankly, spending a moment to double-check the seal can really make the difference in your cooking experience. And for those with specific pressure cooker models, consulting the manual is always a good idea—there might be tips or tricks that are unique to your model.
For added peace of mind during transport or travel, using a slow cooker with locking lids can help ensure meals remain secure if you plan to take your cooking on the road.
Adjust the Venting Knob to the Sealing Position
Getting your pressure cooker ready can feel a bit overwhelming at first, but it’s all about a few simple steps. Ever wondered how to ensure your meal cooks perfectly? Well, adjusting the venting knob to the sealing position is crucial for effective pressure cooking. You definitely don’t want steam escaping!
To kick things off, check that the lid is locked in place. Just align the arrows on the lid and the base—their alignment is key for the sealing feature to work properly. If you’re working with an Instant Pot Duo, just set that venting knob to sealing. On models like the Duo Evo Plus, double-check to make sure the auto-sealing feature is engaged.
Why does this matter? Having the venting knob in the sealing position keeps things safe and helps build the pressure you need for cooking. So, with that taken care of, you’re ready to start that test run! Be sure to use a properly fitting lid, as the seal and fit importance is critical for maintaining pressure during cooking.
Start the Test Run: Set Your Cooking Time
With the venting knob firmly in the sealing position, it’s time to kick off the test run. Finding the Pressure Cook button on your pressure cooker is usually a breeze, though it might differ a bit depending on the model you have.
Now, let’s set the cooking time to 5 minutes. This is a solid duration for our water test, and most pressure cookers, like the Instant Pot Duo, are set to High Pressure by default—no need to fiddle with that setting.
Keep an eye on that display; it’ll switch to showing “On,” signaling the preheating cycle is starting. You might want to stay close and listen for any sounds indicating pressure is building. So, why does this matter? These little steps are crucial for ensuring we release that pressure safely later on.
Using a temperature range gauge can help you monitor pressure cooker safety accurately.
Recap: Setting up your pressure cooker right makes a difference. What’s your favorite recipe to try once you’ve tested your cooker?
What Happens During the Preheating Cycle in Your Water Test?
What Happens During the Preheating Cycle in Your Water Test?
Have you ever wondered what goes on when your pressure cooker starts heating the water? During the preheating cycle, it’s all about getting everything ready for that timed cooking phase. The first few minutes are crucial—this is when the inner pot heats up and you’re looking for the display to switch from your set cooking time to “On.” That’s your signal that things are in motion.
As the water gets warmer, steam begins to rise, which causes the float valve to lift. This process is vital because it ensures that the lid seals properly, making it safe for your meal to cook under pressure. The cooker is smart enough to adjust the heat by itself to maintain that ideal pressure, so you won’t have to worry about getting it just right—unless something feels off.
So, why does this matter? If the lid isn’t sealed correctly or if there’s not enough liquid in the pot, the cooker will let you know by showing an error or getting stuck in preheating mode. Pay close attention to these indicators—they’re there to guide you toward a successful water test.
The best part is, once you recognize these signs, you can troubleshoot them easily. Keep an eye on the display and make sure everything is set up just right, and you’ll be ready to enjoy the benefits of cooking under pressure in no time. Proper maintenance and care of your pressure cooker, similar to how a utility knife maintenance extends a knife’s lifespan, will ensure consistent performance over time.
Understanding Pressurization and Cooking: What to Expect
Have you ever wondered why pressure cookers seem a bit intimidating at first? I get it! The first time I used one, I was a little overwhelmed. But once you understand the basics, it’s really straightforward and can make your cooking so much faster.
When you seal the lid on your Instant Pot and start the cooking cycle, that’s when the magic happens. Steam builds up inside, which raises the temperature higher than boiling point. This means you can cook your favorite meals in about 5 to 10 minutes—how awesome is that? The float valve is your friend here; when it’s up, it’s a good sign that the cooker is pressurized and is safe to use.
Now, here’s the trick: pressure release is something you really need to pay attention to. If you go for a quick release, you could get hit with a burst of steam, and that’s no fun. On the other hand, letting it naturally release is much safer and gives you more control before you open the lid.
So, why bother learning all this? Because with a little practice, you’ll find that pressure cooking can save you time and still deliver delicious meals for you and your family. Just like electric vegetable choppers improve efficiency in meal prep by saving time, mastering the pressure cooker enhances your overall kitchen productivity with streamlined operation.
What to Do After the Water Test
Once the water test is done, you want to make sure everything’s good to go before diving into your cooking. First off, check that the float valve has dropped and all the steam is out. Then, give the release switch a once-over and take a look at the silicone sealing ring for any wear or damage—this little piece is crucial for keeping things running smoothly.
If all that looks alright, you’re ready to pick your first recipe. Just remember to wipe out any leftover water from the inner pot and dry all the parts thoroughly before reassembling your cooker. Oh, and don’t forget to skim through the user manual for any important safety tips or operating instructions; it’s worth it.
Also, choosing a model with automatic shut-off features can add an extra layer of safety and convenience to your cooking experience.
Now, are you excited to whip up some tasty meals with your pressure cooker? Let’s get cooking!
Frequently Asked Questions
How to Test a New Pressure Cooker?
As we commence our culinary journey, let’s guarantee safety precautions by checking pressure settings. We should adhere to cooking times, and remember maintenance tips to keep our pressure cooker as steadfast as a trusty ship!
Can I Test My Pressure Cooker With Water?
Yes, we can test our pressure cooker with water. It’s essential for ensuring proper sealing and pressure safety. Monitoring steam release during this maintenance step helps keep our appliances functioning safely and efficiently.
How to Do a Water Pressure Test?
To perform a water pressure test, we’ll start by verifying safety, adding water to the pot, securing the lid, and preparing the cooktop. Once it’s done, we’ll guarantee proper pressure release for safety.
How Do You Perform a Water Test?
A stitch in time saves nine; to perform a water test, we’ll confirm safety precautions, set the pressure correctly, monitor cooking times, and carefully manage steam release before opening, guaranteeing our pressure cooker’s readiness.


