As an Amazon Associate, we earn from qualifying purchases. Some links on this site are affiliate links at no extra cost to you. Our recommendations are based on thorough research and editorial judgment.

Using Your Multi-Cooker for Fermentation: Pickles and Kimchi
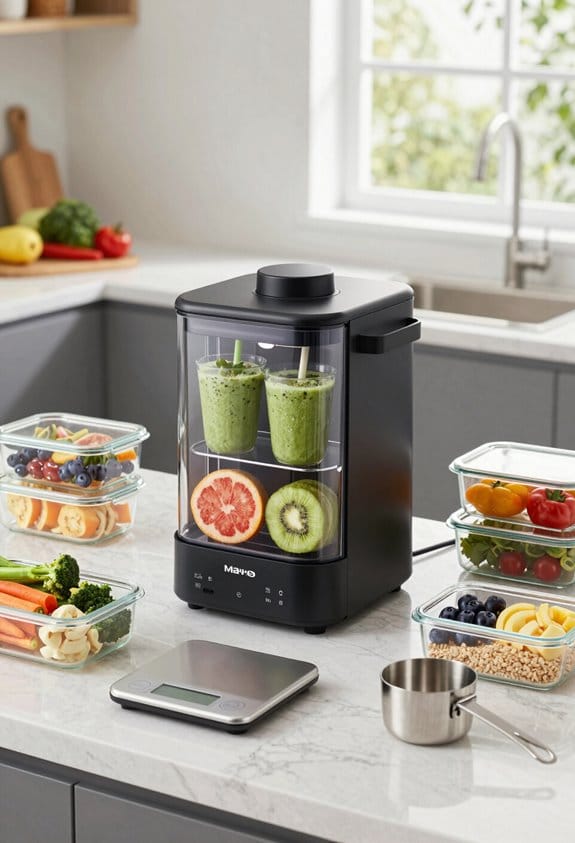
Have you ever thought about making your own fermented goodies at home? It can feel daunting, but trust me, using your multi-cooker makes it a lot easier than you might think!
You may be interested


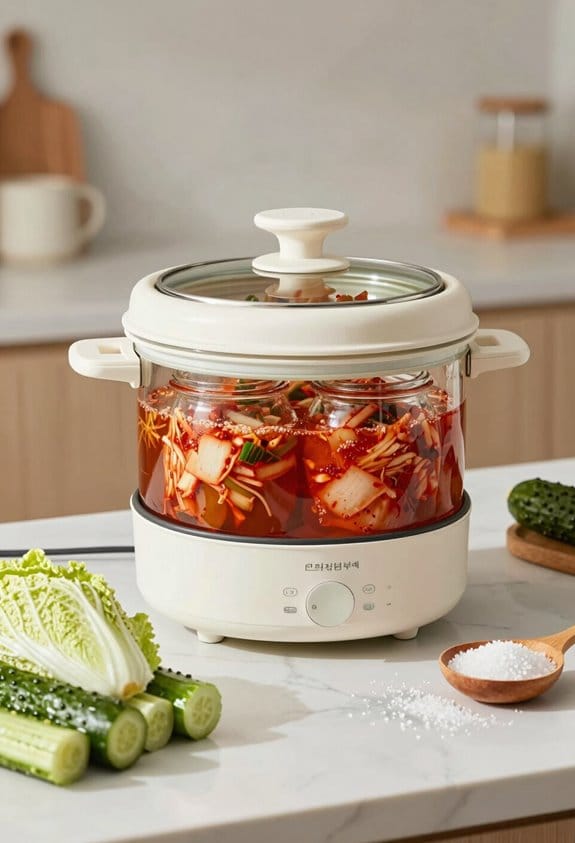
To whip up some delicious kimchi, start by layering shredded napa cabbage with kosher salt. Let that soak for about two hours – it really helps to draw out the moisture.
After that, mix the cabbage with a spice paste made from fish sauce, garlic, ginger, and gochugaru. Once everything’s well combined, pack it tightly into a glass jar. Now, set your multi-cooker to yogurt mode and let it work its magic for 36 hours.
As for dill pickles, here’s the trick: dissolve 1 tablespoon of sea salt in 2 cups of non-chlorinated water.
Pack your cucumbers tightly in a jar, pour that saltwater over them, and let them sit at room temperature for about four days. You might find it hard to wait, but the end result will be so worth it!
Frankly, fermenting your own food not only saves you money but also gives you that satisfaction of creating something delicious from scratch.
So, what are you waiting for? Dive into the world of fermentation and try out these recipes! You’ll be amazed at what you can create.
Key Takeaways
- Utilize the yogurt mode of your multi-cooker to maintain ideal temperatures, significantly reducing kimchi fermentation time to about 36 hours.
- For kimchi, salt napa cabbage, then blend with a spice paste before packing into jars for fermentation.
- For dill pickles, prepare a brine with non-chlorinated water and coarse sea salt, then fill jars with cucumbers and veggies.
- Shake jars during fermentation to evenly distribute flavors and prevent excess gas buildup, ensuring a healthier fermentation process.
- Once fermented, transfer items to airtight glass jars for refrigeration, enhancing flavor and longevity up to one year.
Understanding Fermentation: The Basics of Kimchi and Pickles
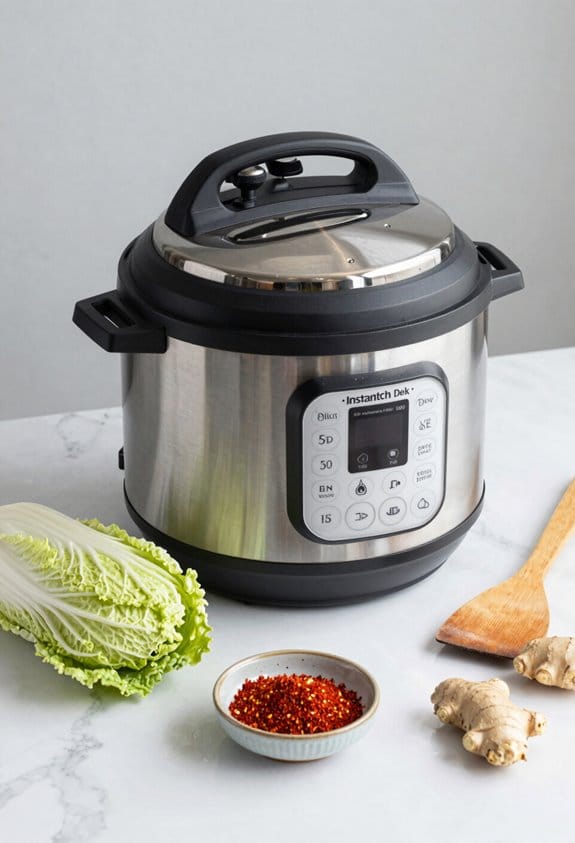
Fermentation can feel intimidating at first, but once you dive in, it’s really not that complex. Let’s chat about kimchi, that delightful Korean dish made from fermented napa cabbage and a mix of spices. To whip up a batch at home, combine ginger, garlic, and Gojugaru. The fermentation usually takes around 8 days, but if you’re like me and want it done quicker, an Instant Pot can cut that down to about 36 hours using the yogurt setting. Pretty neat, right?
Now, when it comes to pickles, the process has its own charm. You’ll want a brine made of non-chlorinated water, salt, and your favorite spices. Let those cucumbers soak in the brine for about four days at room temperature. Check on them daily—look for that telltale cloudiness in the brine, which is a good sign that the fermentation is kicking off.
Storing your ferments in a dark spot is key; it helps the flavors develop beautifully. Honestly, it’s all about trial and error at this stage—don’t hesitate to experiment a little! Using insulated bags can help maintain the ideal temperature for fermentation during storage. Happy fermenting! Are you ready to give this a try?
Choosing the Right Ingredients for Kimchi and Dill Pickles

When you’re diving into making kimchi and dill pickles, it’s all about selecting the right ingredients to get those flavors just right. For kimchi, you can’t go wrong with napa cabbage, kosher salt, fish sauce, garlic, and ginger. Don’t forget to add gochugaru for that signature spice kick, along with some radishes and scallions for extra depth. Here’s the trick: shred your napa cabbage into 1-inch pieces and let it hang out in salt for a bit. This will help draw out moisture, setting you up for that perfect fermentation magic.
Now, let’s talk dill pickles. Cucumbers are the star of the show here, and choosing the freshest ones makes all the difference. You’ll mix up a brine with non-chlorinated water, coarse sea salt, fresh dill, and pickling spices. One key tip? Pack those cucumbers tightly in the jar—this ensures they’re fully submerged in the brine, protecting them from any nasty spoilage. If you’re in a pinch, you can swap out fresh ginger for jarred—just keep the flavor balance in mind, alright?
Honestly, making these fermented goodies at home can be a game of patience, but the reward is so worth it. You get to enjoy your own unique flavors and tailor them to your taste. For best results, consider straining your brine with a fine mesh sieve to remove any unwanted particles before use. Have you tried making your own before? Happy fermenting!
Step-by-Step Guide: Making Kimchi in Your Instant Pot
Have you ever wanted to make your own kimchi but thought it was too complicated? Well, making homemade kimchi in your Instant Pot is not just easy, it’s also super satisfying. To start, you need to salt some shredded napa cabbage and let it soak in water for around two hours. This really helps bring out that extra flavor and improves the texture, which is key for a delicious end result.
After that soaking time, drain the cabbage, and mix it up with a spice paste. This paste consists of fish sauce, ginger, garlic, Gojugaru, along with some chopped radishes and scallions. You might be surprised at how these ingredients work together to create an amazing flavor!
The next step is to pack that spicy mixture into a clean glass jar. Just make sure to leave some space at the top; fermentation gases need room to do their thing. Pop the jar into your Instant Pot and set it to Yogurt mode for about 36 hours. Here’s a little tip: shake the jar occasionally to help the flavors blend throughout.
After the fermentation process, stash your kimchi in the fridge. This will let it develop even more flavor over time. So, how great is that, right? Making kimchi at home not only helps you customize the taste but also gives you that lovely homemade touch in your meals. Using your Instant Pot’s multi-cooking capabilities can add versatility to your kitchen routine by allowing both cooking and fermentation.
A Simple Recipe for Fermenting Dill Pickles
Who doesn’t crave a crunchy, tangy dill pickle? It’s a classic snack that makes your taste buds dance. If you’re ready to jump into the world of homemade pickles, here’s an easy way to do it.
Start by making your brine. Dissolve 1 tablespoon of coarse sea salt in 2 cups of non-chlorinated water. That’s your base for pickling magic! Next, grab yourself a jar and pack in 3 halved cucumbers, 1 sliced onion, and 1 cut carrot. Don’t skip on the fresh dill and pickling spices—those are key. Want a little heat? Toss in 1-2 Habanero chilies.
Once your jar is loaded with vegetables, pour the brine over them, leaving about ½ inch of headspace. Now, seal the jar with an air-lock lid.
It’s time to let the fermentation begin! Set the jar at room temperature for four days. You’ll want to keep an eye on it each day. Check for any spills (nobody wants a mess) and look for that cloudiness in the liquid—it’s a good sign that fermentation is happening.
After four days, pop that jar in the fridge. This helps deepen the flavor of those delicious pickles. Using containers with airtight seals can help prevent spills during fermentation and maintain freshness. Honestly, there’s something satisfying about knowing you made your own snack from scratch. So, what are you waiting for? Give it a try and let your taste buds have a little adventure!
Fermentation Basics for Multi-Cookers
Ever made a batch of homemade dill pickles and thought, “What now?” Well, if you’ve got a multi-cooker sitting around, you’re in luck! You can actually ferment your own veggies right in there, and it’s way easier than you think.
To get started with fermentation in a multi-cooker, you’ll want to use the yogurt mode. This setting keeps things nice and warm, which is ideal for speeding up fermentation. Instead of waiting days or even weeks, your kimchi can be ready in about 36 hours! That’s pretty impressive, right? Remember to give your jars a little shake every once in a while. It mixes everything up and helps with even fermentation, plus it stops gas from building up inside.
Make sure you’re using glass jars that can handle high-pressure cooking; this is super important for safety. Once your veggies are fermented to your liking, pop them in the fridge to slow down the process. Not only does that enhance the flavors, but it also makes them a tasty addition to your meals later on. Many multi-cookers come equipped with user-friendly controls that make adjusting fermentation settings convenient and precise.
Essential Tips for Balancing Flavor and Texture in Kimchi
When you dive into making kimchi, finding that perfect balance between flavor and texture can be quite a challenge. You know what I mean, right? Start by mixing fish sauce with Gojugaru—it gives that savory kick that makes your taste buds dance. The spice level is totally up to you, so don’t hesitate to adjust it based on what feels right. Fresh veggies like scallions and radishes? They’re non-negotiable! They add that crunch that you just can’t skip. Trust me, texture is just as important as flavor!
Here’s the trick: once everything’s mixed together, let the kimchi ferment in your Instant Pot on yogurt mode for about 36 hours. This step is crucial because it helps develop a rich flavor without turning it super sour. And don’t forget to give the jar a little shake every now and then during fermentation. It really helps!
When it’s time to store your kimchi, keep it in the fridge. This is where the real magic happens—the flavors deepen over time, leading to a uniquely tasty kimchi that gets even better with age. Many ceramic rice cookers feature fuzzy logic technology that can help maintain precise fermentation temperatures, optimizing flavor and texture.
So, how about giving it a go? It’s a rewarding process that can really elevate your meals!
How to Get the Right Temperature and Timing for Fermentation?
Getting the right temperature and timing for fermentation can feel a bit challenging at first, but it’s crucial for making tasty kimchi or pickles. Ever wonder why some ferments hit that delicious sweet spot while others seem off? For kimchi, using the Instant Pot‘s yogurt mode can be really helpful. It keeps the temperature around 110°F, which means you can ferment your kimchi in about 36 hours. Remember, when you’re using sea salt in the brine, it’s not just for flavor—it’s controlling the fermentation process, too. Get that balance right, and you’ll encourage the good bacteria while keeping the bad ones at bay.
Now, when it comes to pickles, things change a bit. It’s best to ferment them at room temperature, ideally between 65°F and 75°F, for about four days. You know, keeping those jars tucked away in a dark place can really boost their flavor—who knew light could be such a mood killer for pickles? A little tip to keep things lively: gently shake the jars daily. This not only mixes the flavors but also helps release any built-up gases. And, seriously, don’t overlook the headspace; keeping about ½ inch at the top will prevent any nasty overflow.
Honestly, nail the timing and temperature, and you’ll be well on your way to fermenting like a pro. Do you think you’ll give kimchi or pickles a try? Using a probe thermometer can help ensure you maintain the perfect fermentation temperature consistently.
Common Fermentation Problems and Their Solutions
Ever faced hiccups while fermenting your own goodies? It can feel frustrating when things don’t go as planned. Here are some real-life tips to help you troubleshoot common fermentation issues and make sure your creations turn out just right.
First off, if you’re noticing excessive salt settling at the bottom of your jars, it’s time to rethink how you mix your ingredients. Make sure to distribute the salt evenly throughout the mix. That way, you’ll avoid all that saltiness hanging around at the bottom.
A cloudy liquid on the first day often means fermentation has kicked off. But don’t just leave it be; keep an eye out for spills and try to keep that jar in a dark spot. A little bit of monitoring goes a long way in ensuring a successful batch.
Now, if your batch isn’t fizzing, don’t panic. Check the temperature—sometimes it just needs a little warmth to get going. Also, ensure the container is sealed tightly; that can make a big difference.
Let’s talk smells and mold for a second. If you catch any off smells or see mold, it’s best to toss those jars immediately. Trust me, it’s not worth the risk of eating something bad.
Lastly, if you’re using an Instant Pot, remember that fermentation time can vary. Sometimes all it takes is a gentle shake to encourage a bit more activity.
Using a timer countdown can help you keep track of fermentation stages and ensure your batch is monitored properly.
Storing and Using Your Delicious Fermented Creations
Have you ever poured your heart into making a batch of kimchi or pickles, only to let them spoil before you could enjoy them? It’s a real bummer, but with the right storage, you can savor those delicious flavors for months.
After your fermentation is done, the first step is transferring your tasty creations to sealed glass jars. You’ll want to pop them in the fridge; this not only helps the flavors meld, but they can last up to a year in there! If you’ve run out of space in the fridge, a cool and dark spot in your pantry can work too, keeping them safe for about 6 to 8 months. Just make sure the original brine stays right on top—this helps prevent spoilage.
So, why does this matter? Well, you can easily monitor your jars for any cloudiness—it’s normal, so don’t freak out! Just keep an eye out for gas overflow too. If you want to give your jar a little extra love, shaking it occasionally during fermentation can help mix the ingredients.
Using airtight containers with leak-proof lids after transferring your ferment can greatly extend freshness and prevent spills.
In the end, enjoying your fermented creations is all about proper storage. You’ve put in the effort, so make sure you get the most out of your hard work. What will you create next?
Experiment With Different Flavor Combinations in Your Recipes
Have you ever thought about how a small dash of spice can turn an okay dish into something special? When you play around with different spice mixes, like switching up the Gojugaru in your kimchi, you might just discover new flavor profiles or varying levels of heat that surprise your taste buds. Adding unique ingredients—think sliced ginger or sweet apples—can elevate your pickles from ordinary to extraordinary.
Mixing up your veggies is another simple way to get exciting results. Combining cucumbers with carrots or radishes not only adds vibrant colors but also creates interesting textures that keep things fresh. And let’s not overlook the power of fresh herbs like dill or thyme in your brine. They can bring delightful aromas that make your dishes smell as good as they taste.
Here’s the trick: experiment with different fermentation times in your multi-cooker. You might be amazed at how a little extra time can help you find that perfect crunch and tanginess you’re craving. So, don’t be afraid to take some chances and try out these different combinations in your recipes. Using heat-resistant silicone utensils during preparation can help maintain the integrity of your cookware and simplify cleanup.
Frequently Asked Questions
Can Eating Kimchi Every Day Destroy Gut Bacteria?
No, daily consumption of kimchi doesn’t destroy gut bacteria. Instead, it enriches our gut health with probiotics. However, we should enjoy it in moderation to avoid excess sodium and potential digestive discomfort. Balance is essential!
What Is the 2 Step Pickle Fermentation Method?
Imagine we’re time travelers discovering Pickle Basics! The 2-step pickle fermentation method involves brining cucumbers in saltwater, then aging them in a cooler spot, enhancing their flavor and crunchiness as beneficial bacteria develop.
How to Avoid Botulism in Kimchi?
To avoid botulism in kimchi, we should guarantee proper salt concentration, use clean utensils, maintain the right fermentation temperature, and store it in the fridge. These steps are essential for effective botulism prevention.
Do You Need a Fermentation Weight for Kimchi?
We don’t actually need a fermentation weight for kimchi, but using one can enhance fermentation benefits. By ensuring veggies stay submerged, we minimize spoilage risks while enjoying that delicious, tangy flavor we all love.